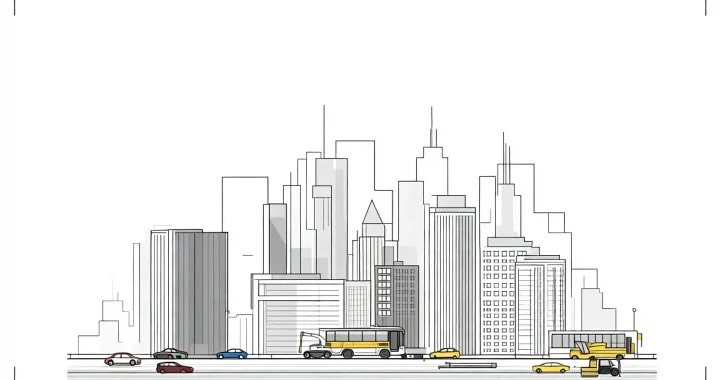
The Best Time of Day for City Photography: Golden Hour vs. Blue Hour

The Best Time of Day for City Photography: Golden Hour vs. Blue Hour

Golden hour and blue hour both deliver strong results for city photography, but they change the mood of your shots in clear ways. Golden hour gives you warm side light and long shadows. Blue hour gives you even cool light with glowing windows and street lamps. Pick based on the look you want before you head out.

Golden Hour in Practice

Golden hour starts about 30 minutes after sunrise and ends roughly an hour before sunset. In summer that window can feel short in places like New York, so check exact times for your date.

  • Side light hits building edges and creates depth on brick or glass.
  • Long shadows stretch across empty plazas early in the morning.
  • Warm tones make older stone streets in Boston or Edinburgh look richer without extra filters.

Try the High Line at 6:30 a.m. in July. The east-facing benches catch direct light while the Hudson stays in shade.

Blue Hour in Practice

Blue hour runs from about 20 minutes after sunset until the sky turns fully dark, usually 30 to 40 minutes. Streetlights and office windows turn on, giving you balanced exposure between sky and city.

  • Cool light makes neon signs and traffic trails stand out against the remaining sky glow.
  • Reflections on wet pavement after rain become stronger in London or Chicago.
  • Even light reduces harsh contrast on modern towers.

Walk the waterfront in Vancouver right after sunset. The sky stays deep blue while the Canada Place sails light up.

Planning Your Shoot

Factor Golden Hour Blue Hour
Light direction Low and directional Soft and even
Color cast Warm oranges Cool blues
Best subjects Architecture details, shadows Light trails, reflections
Tripod needed Sometimes Usually
  1. Check sunset or sunrise time for your city two days ahead.
  2. Arrive 15 minutes early to set up while light shifts.
  3. Shoot in raw so you can adjust white balance later if the color feels off.
  4. Bracket exposures when windows and sky differ too much.

Sustainable Travel in Cities: A Photographer’s Guide

Sustainable Travel in Cities: A Photographer’s Guide

Start by mapping your shoots around public transit and walking routes instead of rideshares. This cuts emissions and often puts you in better spots for street scenes during golden hour.

Pick cities and routes that keep your footprint small

Focus on places with strong train and tram networks. In Amsterdam, the whole city stays reachable by bike or ferry, so you skip taxis and still hit canal views at dawn before crowds arrive.

Book one central room or hostel near a metro stop. Then plot daily walks that connect three or four locations instead of backtracking across town. This saves time and fuel while giving you repeated chances at the same street at different light.

  • Check train schedules first. Overnight or early connections between cities replace short flights on most European routes.
  • Carry only what fits in a shoulder bag. Extra lenses stay home unless you have a confirmed need that day.
  • Use apps that show real-time bus and bike-share availability so you adjust plans on the fly.

Work on location without creating extra waste

Shoot during off-peak hours when buses run half empty. You avoid adding to rush-hour load and often find cleaner backgrounds once delivery trucks clear out.

Follow this short sequence each morning:

  1. Charge batteries overnight at the lodging instead of carrying spares you may not need.
  2. Delete files on the spot so you finish the day with fewer cards to transport.
  3. Leave no props or markers behind. Tape or chalk on sidewalks gets removed before you move to the next corner.

When you need a higher vantage, ask permission at a café or office with a rooftop terrace rather than hiring a drone. Local staff usually allow a quick session in exchange for a coffee purchase.

Common choice Lower-impact swap
Rent a car for day trips Day pass on regional rail plus one shared bike
Print test shots on site Review on camera screen and cull before leaving
Buy single-use water bottles Refill at public fountains marked on city maps

Share files with locals who appear in your frames. A quick email with the photo often turns into permission for a return visit or an introduction to a new angle you missed.

The Rise of Rooftop Culture: Bars, Gardens, and Views

The Rise of Rooftop Culture: Bars, Gardens, and Views

Rooftops have moved from occasional party spots to regular places for drinks, plants, and open air. Start by checking your city map for buildings over six stories with public access.

Pick a rooftop bar that fits your evening

Most good spots open around 4 pm on weekdays. Visit one attached to a hotel first. They usually keep steadier hours and simpler menus.

  • Try a converted warehouse roof on a Tuesday when the crowd stays small.
  • Skip Friday nights at hotel bars if you want space to talk.
  • Order a house cocktail and ask the bartender which nights draw locals instead of tourists.

Add plants without a full build

Many rooftops now keep raised beds or pots along the edges. You can copy the same idea on a smaller scale.

  1. Choose herbs and leafy greens that handle wind.
  2. Use 5-gallon buckets with drainage holes.
  3. Water in the morning so the surface dries before evening use.

One owner I know keeps basil and mint in the same containers because they both tolerate full sun and need little soil depth.

Time your visit for clear views

Time of day What you usually see Best for
30 minutes before sunset Soft light on buildings Photos and relaxed drinks
After dark City lights and fewer people Quiet conversation
Early morning Empty space and cooler air Reading or coffee

Check a weather app the same morning. High wind or low clouds cancel most of the view reward.

Make rooftop time part of your week

Bring a small blanket and one low chair if the venue allows personal items. Keep a short list on your phone of three rooftops within a 20-minute walk or transit ride. Rotate through them once every couple of weeks so each visit stays fresh instead of routine.

Minimalist Urban Photography: Tips for Clean, Impactful Shots

Minimalist Urban Photography: Tips for Clean, Impactful Shots

Start with one subject and a lot of empty space around it. That single choice turns crowded streets into clean frames. Walk at dawn when delivery trucks have not yet filled the sidewalks.

Pick and Frame One Thing

Look for a single object that stands out because nothing else competes with it. A red mailbox on a gray wall works. A metal grate casting a sharp shadow at noon works too.

  • Stand so the subject sits in the lower third and the rest of the frame stays blank wall or sky.
  • Move your feet instead of zooming. Three steps left often removes a sign or parked car from the edge.
  • Check the corners. If anything pulls the eye away, shift until it disappears.

Use these quick checks before you press the shutter:

  1. Is there only one clear subject?
  2. Does the background stay quiet for at least two thirds of the frame?
  3. Is the light even or does it create one strong shape?

Try this on a weekday morning: the lone bike locked to a pole outside an office building with nothing else in view. Or the black fire escape ladder against a pale concrete wall at the end of an alley. Both need almost no editing once the frame is right.

Common clutter Fix
Multiple signs Step closer until only the one you want remains.
Passing people Wait thirty seconds or change angle to hide the sidewalk.
Bright colors fighting Shoot the same spot in shade or on an overcast day.